Thursday, September 30, 2010

Simple and Stylish Scarf

"Style is knowing who you are, what you want to say, and not giving a [care]." - Gore Vidal

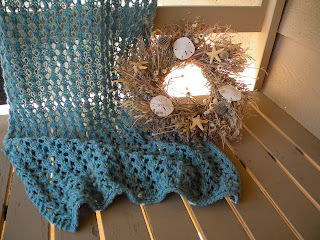
This scarf is simple to make and stylish to wear. Pair it with Madame Defarge's Beret in the same color for added style.


You will need:
  • about 300 to 500 yards worsted weight yarn in preferred color
  • Straight U.S. size 9 or 10 knitting needles
 Cast on 24 stitches, knit 2 or 3 rows. On the 4th row, purl the whole way across. On the 5th row, knit 6 stitches, purl 12, then knit the last 6 stitches. On 6th row, purl the whole way across. Repeat until scarf is about 3 to 4 feet long, and has the smooth stockinette panel flanked by the garter stitch border all the way along. At the end, knit three rows and bind off loosely.

Wear in cold weather, when a touch of style is needed.

Tuesday, September 28, 2010

Chinese Shrimp Kabobs

"I shall be but a shrimp of an author." - Thomas Gray

These kabobs are incredibly simple to make. They taste great and are very healthy, too.


Recipe:
  •  1 bag frozen raw shrimp, thawed and deveined, with tails removed
  • Colored bell pepper, chopped into pieces
  • Pineapple chunks
  • Green onions, sliced into 2 inch pieces
  • Chinese Hoisin Marinade sauce
 Prepare and rinse shrimp thoroughly in cool water. Using all-metal skewers, place a shrimp, a pineapple chunk, a piece of bell pepper and a piece of green pepper on a skewer, repeat until skewer is full. Repeat with all skewers. Line a jelly-roll pan with foil and place a wire rack on top. Lay each skewer on the wire rack, with a little space between each one. Turn on the broiler and allow to heat, then place the pan with the skewers in the oven, about 4 inches from the broiler coils. Cook for 4 to 5 minutes.
In a small dish, pour out some of the Hoisin marinade sauce. Using a small brush, coat the contents of each skewer with the sauce. Place the pan back in the oven and cook for another 4 minutes. Remove contents of skewers and serve with brown rice, if desired.
Enjoy!

Monday, September 27, 2010

Patriotic Fruit Pizza Cookies

"My patriotic heart beats red, white and blue." - Author Unknown

These cookies are good for patriotic holidays, campaign events, etc. Any time you want to wave the flag and eat dessert at the same time.


Recipe:
Makes: about 32 cookies
  • 2 packages ready-made Pillsbury Sugar Cookie dough
  • 2 containers Whipped Cream Cheese
  • Any flavor jam (strawberry or raspberry work best)
  • Fruit for topping (berries, etc.)
Slice dough into rounds, so that you get at least 16 slices from each package. Lay out on baking sheets and bake according to package directions, allow to cool. Spread a layer of whipped cream cheese on top of each cookie. Wash fruit thoroughly, dry, and lay in a small arrangement on the cookie, being careful not to completely cover the cream cheese (see picture). Melt 1/4 cup jam completely in the microwave or a small saucepan, adding more if needed, and brush the top of the fruit on each cookie. Serve immediately.

Enjoy!

Saturday, September 25, 2010

Pot of Gold entrelac knitted purse

"Our purses shall be proud, our garments poor: For 'tis the mind that makes the body rich; and as the sun breaks through the darkest clouds, so honor peereth in the meanest habit." - The Taming of the Shrew, Act IV, scene iii, William Shakespeare

As I've already mentioned, I love Entrelac knitting. Here, I used it to make a purse, which was a little complicated but turned out well.


You will need:
  • Yarn: about 300or so yards of a primary, dark color and 100 yd. or less of gold color. Yarn weight: worsted
  • U.S. size 9 or 10 knitting needles
  • Purse handles
  • Darning needle
  • About 1/2 yd. Polyester mix fabric for lining, in complementing color
  • needle and thread in corresponding color to fabric
  • Optional: crochet hook and button for making purse closure
 Cast on 36 stitches. Knit in sections of 6 stitches for this entrelac pattern. Follow the directions on this link, but take heed to my directions below for obtaining the color changes.

After knitting the first three rows, on the fourth row - knit one section of 6 stitches in the primary color, cut primary yarn and attach gold yarn, knit four sections. Cut gold yarn and reattach primary yarn, knit last section of 6 stitches.
Knit two rows of entrelac in primary color, repeat as with gold yarn. Knit two more rows of entrelac in primary color, then repeat as with gold yarn one more time.
Knit fifteen more rows in primary color, then bind off according to the directions above. Fold knitted panel over face-down with the wrong side out, and sew the left and right sides together using the darning needle and primary color yarn. Turn purse right side out. Take polyester mix fabric, measure and cut for the purse lining, place fabric panels facing each other, wrong side out, and sew sides together - Do not turn right side out. Place lining inside purse, turn top edge of fabric over, and sew to inside edge of knitted purse using regular sewing needle and corresponding thread. Attach handles to purse using darning needle and primary color yarn to sew into place.
For purse closure: Sew button on one edge of purse, in the middle of the space between the sides of the purse handle. Using primary color yarn and a crochet hook, create a crochet chain long enough to reach the button from the opposite edge of the bag. Sew the two ends to the opposite side of the bag, across from the button, and place this loop over the button to close the bag.

Good luck!

Thursday, September 23, 2010

Hawaiian Islands Chicken Salad

"No man is an island, entire of itself; every man is a piece of the continent." - John Donne

You don't have to be on an island (or be an island, for that matter) to make and adore this tasty chicken salad.


Recipe:

  •  2 3-oz. packages cream cheese, softened
  • Kool Whip
  • 1/3 cup Miracle Whip
  • Marshmallow Cream
  • 1 8-oz. can pineapple tidbits, juice reserved
  • 3 5-oz. cans chunk chicken, drained
  • 1 8-oz. can mandarin oranges, drained
  • 1 cup blanched, slivered almonds
  • Dried cranberries
  • 1 1/2 cups halved seedless grapes
 In a medium bowl, beat cream cheese until fluffy. Mix in Miracle Whip and pineapple juice, and add the Kool Whip and Marshmallow Cream according to taste, until smooth and creamy. Stir in pineapple, chicken, oranges, almonds, grapes and cranberries until evenly coated. Chill until serving.

Aloha!

Tuesday, September 21, 2010

Silken Samarcand Cinnamon Buns

"With jellies smoother than the creamy curd/and lucent syrops, tinct with cinnamon;/Manna and Dates, in argosy transferr'd/from Fez; and spiced dainties, every one,/From silken Samarcand to cedar'd Lebanon." - from The Eve of St. Agnes, John Keats

Cinnamon Buns are a tasty harbinger of Fall. If you've ever made bread before, you're over half way to knowing how to make cinnamon buns. When they come out right, it's very delicious and impressive.


Recipe: 
  • 2 cups warm whole milk (105 degrees F to 110 degrees F)
  • 2 (1/4 oz.) packages active dry yeast
  • 1/2 cup sugar, divided
  • 5 cups Bread flour
  • 1 tbsp. salt
  • 1 cup vegetable oil
  • 2 large eggs
  • 1 cup dark brown sugar
  • 2 tsp. ground cinnamon
  • 1/2 cup butter, melted
Frosting:
  • 6 tbsp. butter, softened
  • 3 cups powdered sugar
  • 1 1/2 tsp. vanilla extract
  • 2 tbsp. milk
 In a small bowl, combine warm milk, yeast and 1/4 cup sugar; let stand for 5 minutes
In a medium bowl, combine 5 cups bread flour, remaining 1/4 cup sugar, and salt. In the bowl of a standing mixer, combine milk mixture, oil and eggs - whisk until just mixed. Gradually add the flour mixture to the milk mixture, stirring by hand with a wooden spoon after each addition - do NOT over-stir. Fit the dough hook to the mixer and mix until dough is soft. Turn dough out onto a lightly floured surface, and knead until smooth and elastic, about 5 minutes (add more flour to the surface if dough becomes sticky). Place dough into a large, lightly greased bowl, turning dough over to grease the top. Cover, and let stand in a warm place (85 degrees F.), free from drafts, for 1 to 1 1/2 hours, or until dough has doubled its size. Punch dough down, cover and let stand for 10 minutes.
Lightly grease 2 9x9 inch pans, set aside. In a small bowl, combine brown sugar and cinnamon, set aside. Divide dough in half.
On a lightly floured surface, roll out dough into a 10x15 inch rectangle, brush dough with half of melted butter. Sprinkle with half of brown sugar mixture, leaving a 1 inch border on the long side of the dough. Roll up dough, starting at long side, jelly-roll fashion, pressing edge to seal. Cut into 1 inch slices, place in prepared pan. Repeat with remaining dough, butter and brown sugar mixture. Cover pans, and let rise in a warm place (85 degrees F) for 1 hour, or until double in size.
Preheat oven to 350 degrees F. Bake rolls for 25 to 30 minutes until lightly browned. Let cool in pans for 5 minutes. Invert pans onto serving dishes or baking sheets lined with parchment paper.
Frosting: Combine all ingredients in a medium to large mixing bowl, mixing with a hand-held electric mixer until smooth and creamy. Spread frosting on top of hot rolls.
Enjoy!

Tuesday, September 14, 2010

Jane Austen shawl

"'It is very pretty' said Mr. Woodhouse. 'So prettily done! Just as your drawings always are, my dear. I do not know anybody who draws so well as you do. The only thing I do not thoroughly like is, that she seems to be sitting out of doors, with only a little shawl over her shoulders -- and it makes one think she must catch cold.'
'But, my dear papa, it is supposed to be summer; a warm day in summer. Look at the tree.'" - Emma, Jane Austen

I have a passion for knitted shawls, and am always in search of the best and prettiest pattern. This pattern from Cabin Fever is very pretty, although a little challenging for anyone who has never attempted lace knitting before. However, it is not hard to figure out with a little help from a knitting instruction resource.


The pattern can usually be ordered through most yarn shops, or online at the Cabin Fever website. Here is the link to the pattern.

Wear it outside on a nice Fall day, but don't catch cold!

Monday, September 13, 2010

Italian Eggplant Parmesan

"The trouble with eating Italian food is that, 5 or 6 days later, you're hungry again." - George Miller, British Writer

My blog posting is going to be a bit unscheduled and random these next two weeks, but will hopefully return to normal towards the end of the month.

Eggplant Parmesan is one of my favorite Italian foods - I grew up in a heavily Italian/Mediterranean area, and have developed an intense love of this particular cuisine.


Recipe:
  • 1 Eggplant, peeled, sliced into 1/4 inch rounds
  • Flour
  • Oil
  • Milk
  • Seasoned Salt
  • 1 lb. Spaghetti Sauce
  • 1/2 lb. hamburger
  • 1/4 cup grape jelly
  • 1 14-oz. can stewed, sliced tomatoes
  • shredded mozzarella cheese
  • Crumbled Parmesan cheese
 1. Preheat oven to 375 degrees F. Moisten eggplant with milk and coat lightly in flour mixed with a little seasoned salt. Brown slices in oil on both sides, until tender when pierced with a fork, and transfer to jelly-roll pan lined with parchment paper. Cover loosely with foil and bake in oven for about 20 to 25 minutes. Use about 8 to 16 slices for this amount of sauce.
2. Brown the hamburger in a skillet. In a saucepan, combine the sauce, jelly and tomatoes, breaking tomatoes up with a fork. Add the browned hamburger. Heat on medium heat until hot, but not bubbling, making sure the jelly is melted.
3. You can either make regular eggplant Parmesans, or "stackers" - for the former, using only 8 eggplant slices, place a good sized helping of mozzarella on the eggplant slice and top with just enough sauce to cover the whole thing, but not overflow.
For the "stackers," using 16 eggplant slices, place the mozzarella on the first slice, top with a second slice, and ladle enough sauce on top to cover the whole thing without overflowing too much.
Leave the assembled eggplants on the jelly-roll pan, and place back in the hot oven for about 3 minutes or so to melt the cheese. Serve promptly, garnish with Parmesan cheese and serve with pasta on the side, if desired.
Enjoy!

Friday, September 10, 2010

Down Home Chicken Corn Soup

"Sometimes I lifted a chicken that warn't roosting comfortable, and took him along. Pap always said, take a chicken when you get a chance, because if you don't want him yourself you can easy find somebody that does, and a good deed ain't ever forgot. I never see Pap when he didn't want the chicken himself, but that is what he used to say, anyway." - The Adventures of Huckleberry Finn, Mark Twain

"Knee-high by the Fourth of July" - American corn farming maxim

This soup is absolutely delicious during cold seasons, but is best made in summer, during the height of corn season. And in Fall. And Spring. Pretty much whenever you need a taste of home is a good time to make a huge pot of it.


Recipe: 
  • 6 tbsp. butter
  • 1/4 cup finely chopped onion
  • 1 cup finely chopped celery
  • 6 tbsp. all-purpose flour
  • 2 cups chicken broth
  • 1 1-lbs. can cream style corn
  • 6 ears of fresh corn
  • 3/4 cup milk
  • 3/4 cup half and half
  • 2 tbsp. shredded carrot
  • 1 tbsp. finely minced parsley
  • 2 pinches ground cloves
  • 1 cup dried Spaetzel
  • 1/4 tsp. grated nutmeg
  • 1/8 tsp. black pepper
  • 1 1/2 cups coarsely shredded cooked chicken
 In large saucepan, cook butter, onion and celery over medium heat for 3 minutes. Stir in flour and cook for 5 to 6 minutes longer, until mixture is golden. Add broth and whisk until smooth, raising the heat a little. With a sharp knife, take the ears of corn one by one and, holding them with one end sitting on a cutting board, cut the corn off all around the cob. Add ALL the remaining ingredients except for the chicken, the fresh corn and Spaetzel, lower the heat and simmer for 3 minutes. Add chicken, Spaetzel and fresh corn just before serving - allow soup to stand for a few minutes to heat completely before serving.

Enjoy!

Wednesday, September 8, 2010

Dream of the Rood wedding cross decoration

"It seemed I saw the cross itself/borne on the air, light wound about it" - The Dream of the Rood, anonymous

"Reader, I married him." - Jane Eyre, Charlotte Bronte

A very dear friend is getting married in less than two weeks, and she asked me to come up with a knitted cross for her to use in her decorations for the church. The result turned out very well, and is a cute, affordable way to make church-related decorations.


Directions:

Makes: at least 27 crosses
  • about 324 yd. of 100% cotton yarn, in your primary color, color A (for this one, I used Hunter Green, one of the wedding colors)
  • 108 yd. of 100% cotton yarn in color B (I used White, for the bridal theme)
  • 108 yd. of 100% cotton yarn in color C (I used Pink, my friend's other wedding color)
  • Straight knitting needles, U.S. size 6
  • Crochet hook size H/8  5.00mm
  • Concentrated liquid laundry starch
  • Sponge brush
  • Cork board
  • Straight pins
  • Paper towels
 With yarn color A, cast on 8 stitches and knit 1 row. Purl the 2nd row. Continue in stockinette stitch until the work measures 7" long. Bind off loosely.
*Measure 1 1/2 inches down from top of work, pick up 8 stitches on one side. Knit in stockinette stitch until 11 rows have been knitted. Bind off loosely*
Repeat from * to * on the opposite side, being careful to make sure that the stitches picked up for the sides are directly straight across from each other. Tie off the ends as you go, and weave them in.
**With yarn color B and crochet hook, crochet an edge around the entire outside of the cross once. Tie off yarn and weave in end.**
Repeat from ** to ** with yarn color C.
Place layer of paper towels on top of a section of the cork board, about 3 sheets deep. Using the straight pins, carefully stretch the cross out to it's actual size (do not over-stretch it), and pin into place along the crocheted edge, making sure it lays straight and flat. Pour some of the starching liquid into a small bowl - do not dilute it. Dip the sponge brush into the liquid and carefully apply to the cross all over, avoiding the crocheted edge. Be sure to saturate the entire knitted part of the work thoroughly. Lay the board with the cross in a cool, safe place to dry - it may take about a day or so to dry thoroughly. Carefully unpin and remove the cross from the board. Repeat for as many crosses as you want.

These are good for weddings, as well as other church-related activities. Enjoy!

Monday, September 6, 2010

Devilish deviled eggs

"An egg is always an adventure; the next one may be different." - Oscar Wilde

Deviled eggs are one of my favorite foods. Not only are they healthy and simple to make, they are sinfully delicious. There are lots of variations on the filling for deviled eggs, but I prefer to use my mom's recipe.


 Recipe:
  •  About 1 dozen eggs, or however many you want
  • 1 tsp. vinegar
Filling:
  • 1/4 cup mayo
  • 1/2 tsp. mustard
  • minced onion
  • 1/2 packet of dry ranch dressing mix
  • sliced olives (optional)
  • parsley or paprika for garnish
 Place the eggs in a large pot of water, with enough room so that they don't bump each other, and bring to a boil. Once boiling, turn off the heat and place the pot on a cold burner. Add 1 tsp. of vinegar to the water to help with peeling - it will not affect the taste. Allow the eggs to sit in the water for 30 mins. Carefully peel the eggs and discard the shells. With a sharp knife, slice the eggs in half lengthwise. Take a small spoon or knife and gently remove the yolks from the all eggs, and place in a medium sized mixing bowl. Break the yolks up with a fork. Lay the eggs slices out on a platter or plate.
To the egg yolks, add the mayo, mustard, minced onion, ranch powder and sliced olives, if desired. If needed, add a little more of the mayo and mustard to get a creamy, smooth consistency. Mix well until combined.
Now, either spoon the mixture into a piping bag, or carefully use a spoon to fill the eggs with the mixture. Be sure to avoid overfilling the eggs.
Sprinkle with parsley and/or paprika to garnish, and serve.
Enjoy!

Saturday, September 4, 2010

Joseph's Coat of Many Colors entrelac blanket

"Now Israel loved Joseph more than all his children, because he was the son of his old age; and he made him a coat of many colors." - Genesis 37:3 (KJV)

I love the entrelac knitting pattern - it can be used in a variety of projects, and has a beautiful basket-weave look and feel. It's a little tricky to learn at first, and is easy to mess up if you aren't paying attention, but once you have it down it's very straightforward and fun.


I designed and knitted this blanket pattern this spring and summer. It's a lot of fun to do with a variety of colors, but can be done with anywhere from five or six to one or two colors.

You will need:
  • About 3,360 yards of 100% Wool or a Wool Blend yarn, in however many colors you want, with extra of one color for the border. I used 500 yd. each of red, brown, purple and teal, and about 1290 yd. of blue, which I used in the blanket and for the border.
  • Circular knitting needles U.S. size 8-10, depending on your yarn.
Finished blanket measurements:  58" x 44"

Cast on 96 stitches.
Follow the entrelac tutorial on this website, and adjust the instructions to the number of stitches you have cast on. *note: The entrelac panels for the blanket are knitted over 8 stitches each, which is different than the scarf in the tutorial, where the panels are knitted over 6 stitches each.
Knit until the blanket measures 54" long and bind off loosely according to the instructions on the above tutorial.
With the yarn for the border, cast 20 stitches onto the same size needles. Knit in regular garter stitch, sewing the border on to the blanket using a darning needle and the same color yarn. Be careful not to stretch the border as you sew it - make sure it lays flat. Tuck and sew the corners carefully into place, so that they lay flat. Once you reach the beginning of the border, bind off loosely and sew the edges together. Weave in all loose ends, then block.
Please leave a comment below if you have a question.
For knitting help tutorials, go to this link.

This is a very snug, cozy afghan/throw that is perfect for cool days. Enjoy!

Wednesday, September 1, 2010

Sea Maid's lacy beach wrap

"We have lingered in the chambers of the sea/by sea-girls wreathed with seaweed red and brown" - The Love Song of J. Alfred Prufrock, T.S. Eliot

This lacy wrap is perfect for a day at the beach - the lace knitting gives it a lighter, looser feel so that it can be used during warm months, and the chunky wool gives it just enough warmth so that it can be used on cool days.


To get the shawl to come out like this, take a chunky weight, wool yarn in a Sea Green shade (or any color you prefer) and use U.S. size 15 circular knitting needles.

The pattern is on this website.

Wear it at the beach and try to find a mermaid :-)